There is no denying the fact that crafting fine wines is an art in and of itself. That art deserves to be enjoyed and appreciated by all those willing. Appropriate will, however, cannot hide the fact that you know nothing about properly serving a bottle of wine, let alone getting one open without soaking yourself and your surroundings in shade-of-fermented-grape.
In this tutorial, you will be instructed in the proper use of the Waiter’s Corkscrew, also known as a Waiter’s Key, for the purpose of uncorking just about any cork-stopped bottle, be it wine, champagne, or a fine bubbly juice beverage. Off the record, I would list this skill among the top ten things any man should know how to do, especially when attempting to impress a particular lady friend.
Just about all Waiter’s Corkscrews have the same basic components:
1. A knife-edge, usually serrated
2. A worm, or the part one normally associates with corkscrews
3. A series of notched levers, your standard screw will have two notches.
All parts are hinged to allow the corkscrew to be collapsed and stored easily.
Now that you are familiar with the essential components, it is time to uncork a standard bottle.
STEP 1: Remove the Foil
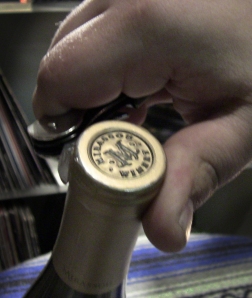
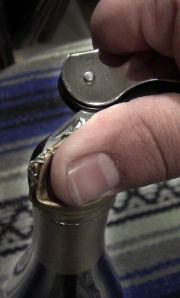
Chances are, your bottle has a foil,or sometimes, plastic seal to help preserve the cork itself from damage or contaminants. This is where the knife-edge comes into play.
Place the knife-edge below the lip of the spout and, using your thumb to add pressure, run the blade around the circumference of the seal to cut a complete ring around the foil. Once cut, the blade may be used to peel or pry the foil from the bottle. Having served its purpose, the foil may be discarded.
STEP 2: Inserting the Worm
Once the foil is removed and the cork is revealed, it’s time to properly drive the worm into the cork. Collapse the knife-edge and open up the rest of the corkscrew. The notched levers will typically open all the way while the worm will only open perpendicularly to the handle, creating a T-shaped device (as seen in the parts diagram).
It is important to keep in mind before jamming your worm in any old cork that the tip of the worm is not necessarily the center of the device. One should pay close attention to insure that the entirety of the worm is inserted into the center of the cork rather than the tip of the worm, usually by offsetting the tip slightly.
Once proper worm placement is found, proceed to drive the entire worm into the cork.
STEP 3: Removing the Cork
At this point, your worm should be firmly driven into the cork. The uneducated among us would assume that the next step involves seating the bottle firmly between our thighs and yanking up on the corkscrew to pull the cork out the hard way like a sort of zoo animal. This can be done, but the Waiter’s Corkscrew has a dignity-saving feature that, while lacking showmanship, adds class to any social gathering.
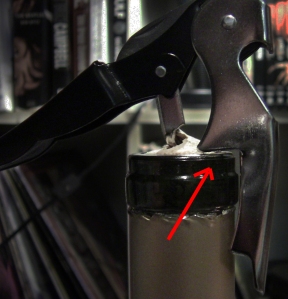
With the worm seated in the cork, hinge the notched levers toward the bottle, raising the notches if necessary, until the first notch is flush with the rim of the bottle. Set this notch onto the bottle.
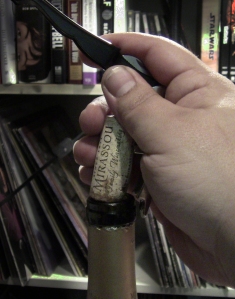
With the notch set in place, raise the handle of the corkscrew as far as feasibly possible. Using the mechanics of leverage, the worm will lift with the handle, pulling the cork out as well. But, we aren’t quite done yet. There’s still a bit of cork left in the bottle. While it may be possible at this point to remove the rest of the cork by hand, twisting it from the bottle, a gentleman knows to use the second notch to properly remove the remaining cork.
One more pull of the handle and your cork should easily find itself free of the bottle. Congratulations, you’ve properly uncorked a bottle with ease and sophistication!
Now you’ll fit more easily into the upper classes thanks to your new skill with a common household device! Celebrate with an appropriately paired dish and laugh about your former ignorant ways, you stud you.


